Categories
Company Info
Inspiration & More
Poppy Cap Earrings Tutorial
Tutorial by Keirsten Giles
Visit Keirsten's Etsy shop: LuneDesigns and follow her blog: The Cerebral Dilettante
| This tutorial teaches an easy way to create a folded poppy-like metal cap for a disc bead. No sawing or difficult cutting! You can get the look of a complicated bail, without any soldering or riveting. |
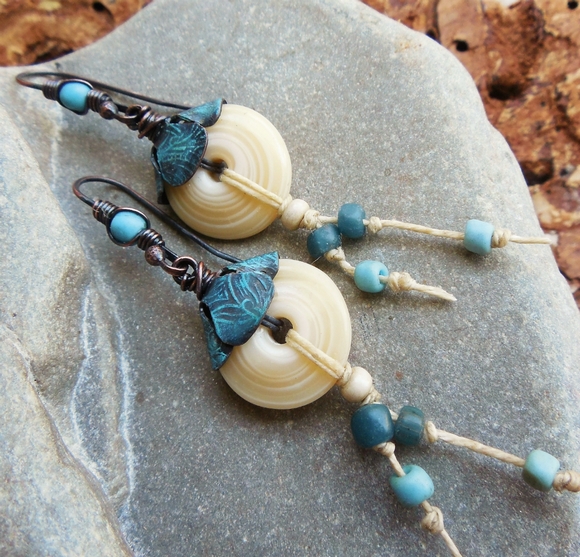 |
|
This is an intermediate to advanced technique, requiring metalworking skills such as torch annealing, various texturing techniques, antiquing or patina techniques, and wire wrapping. |
|
For this project, you will need the following tools:
If you are going to texture your caps, you will need tools for embossing, hammer texturing, or etching. I have embossed my caps using brass texture sheets and a hammer (using the hammer to impress the texture instead of a rolling mill). You can also use pre-textured metal, as long as it isn’t thicker than 26 gauge (it may be too hard to manipulate if it is thicker), and as long as it isn’t coated (you will need to anneal it to make it workable, and any coating or finish will be ruined and may also be toxic if torched). Heavily etched 24 gauge sheet may be workable, such as these pre-textured sheets. This tutorial does not include instructions about how to texture metal, but check out these links: Embossing with a hammer and texture sheet and etching with digital images. For this project you will need the following supplies:
Optional supplies
|
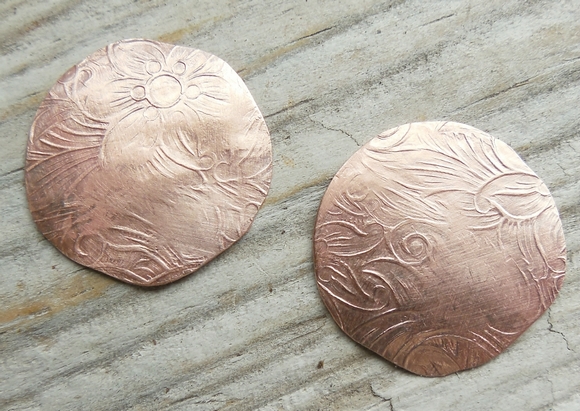
| 1. Cut two ¾” discs from your 26 gauge copper sheet with your disc cutter. Texture if you wish (texturing instructions are not included in this tutorial). |
 |
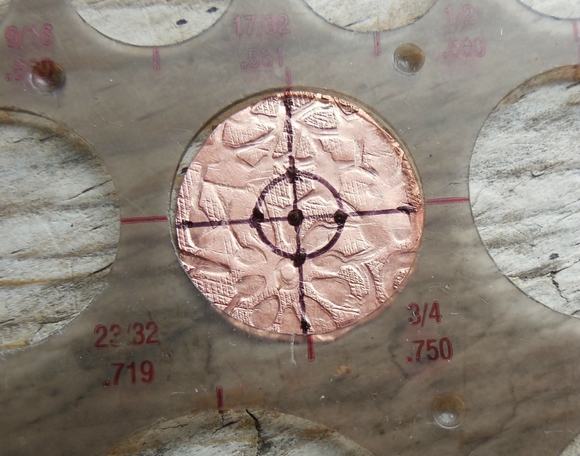
| 2. Place your metal disc (after texturing, if you have chosen to do that) into the corresponding size hole on your circle template. The template should have 90-degree intervals marked (dividing the circle into quarters). With your Sharpie, mark your discs at the quarter-circle marks, and connect the marks with straight lines so that they intersect in the middle of your circle. Mark the center with a dot. Using the 17/64” circle on your template, draw a circle around the center point. Mark the four points where the circle intersects your lines with dots. You should now have five dots - one in the middle of the circle, and four dots surrounding it at the quarter-circle points. |
 |
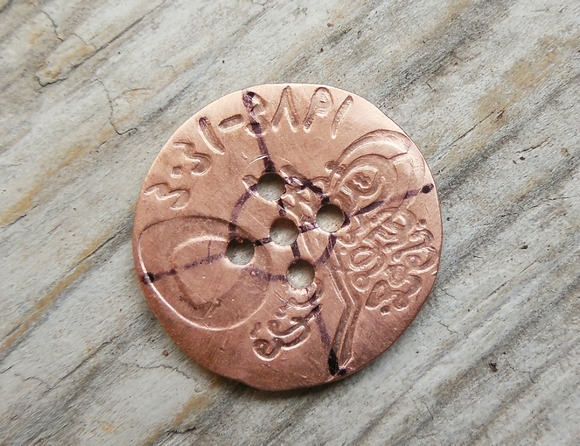
| 3. With your 1.8mm hole punch pliers, punch holes at all five marks. |
 |
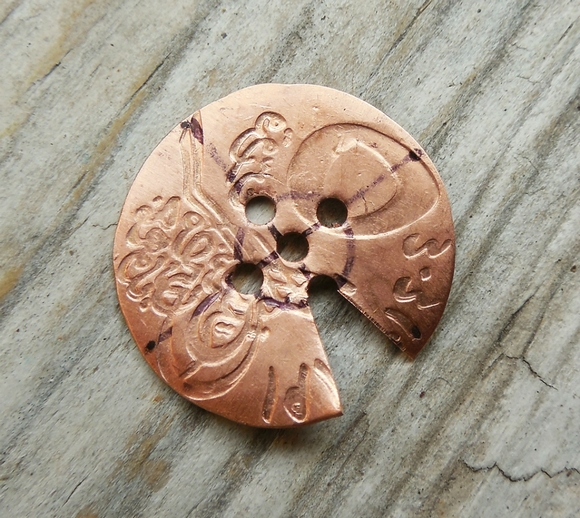
| 4. With your metal snips, snip in from the edge of the disc up to both sides of each hole in the outer circle. You will create skinny, triangular shapes running up to each hole. |
 |
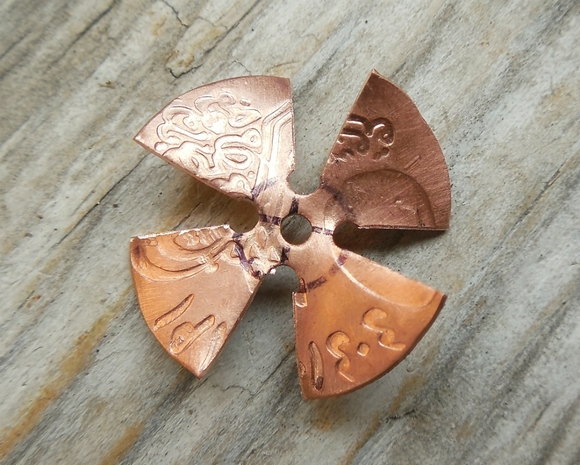
| 5. Once you have done this with all four holes, your disc should look like a pinwheel. Try to make uniform cuts at all four holes - they should be close to the same, but don’t have to be exact. We’re going for a rustic look! |
 |
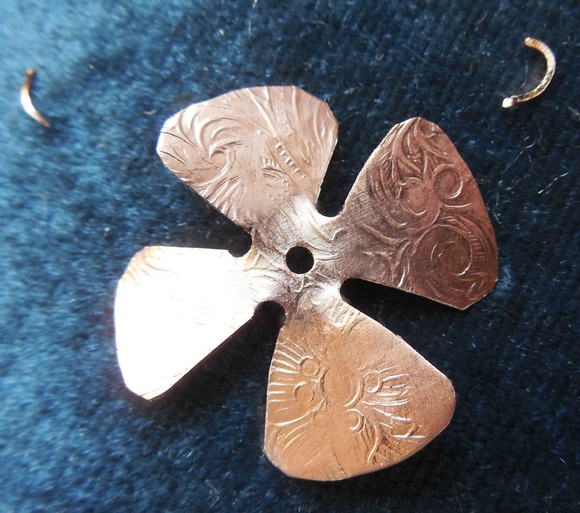
| 6. Using your snips, round each sharp edge on your pinwheel until you have four gently rounded petals. They don’t have to be perfect! Using your snips or a mini flat file, smooth out any uneven spots. Sand the edges smooth with 400 grit sandpaper. |
 |
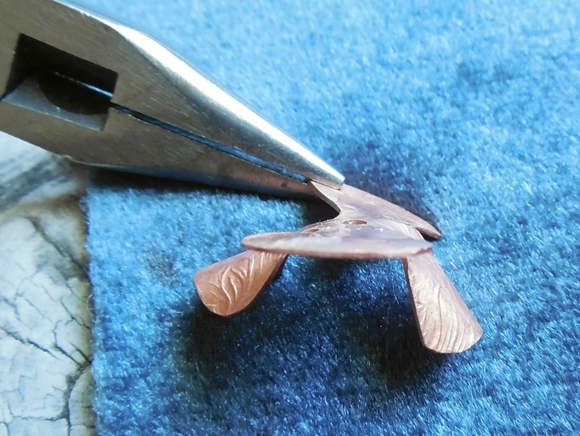
| 7. Use steel wool to remove any Sharpie ink when you’re done creating your petals. 8. Anneal in your torch and quench in plain cold water. Pickle, rinse, and using your fingers rub the pickled metal gently with a paste of baking soda and water to neutralize and clean the powdery residue from the pickle. Rinse again and pat dry. Be careful not to bend or twist your metal, as this will re-harden the metal. 9. Decide which petal you want at the front of your disc bead. With your bent nose pliers, gently bend down the tips of the two petals on either side of your front petal. These will curve down over the disc bead, and will eventually be folded under the front petal. |
 |
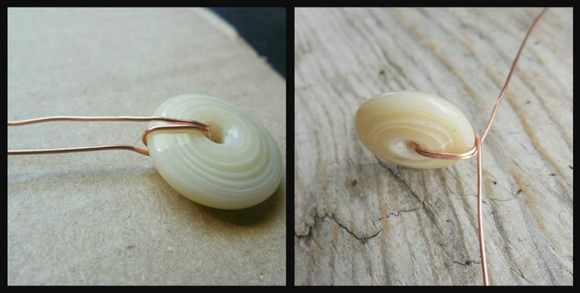
| 10. Cut a 9” length of 22 gauge copper wire. Thread it through the disc bead twice, as shown, with approximately equal tails left on each side. Pull it tight, and push each tail partly over the top of the disc to create a curve. |
 |
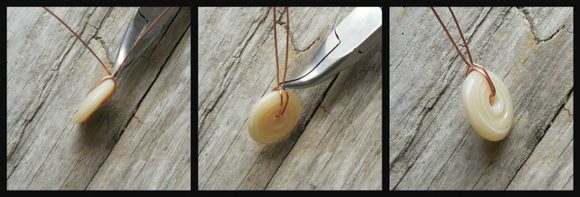
| 11. Then with your bent nose pliers, grasp each tail at the top of the disc and bend it back upwards so both tails are sticking straight up and nestled against each other. |
 |
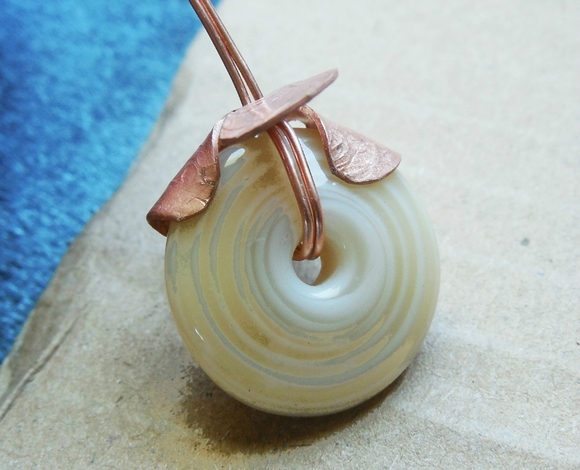
| 12. Slide your poppy cap (the one you prepared by curving the side petals slightly down and in) down over the two tails so that it snuggles down on top of the disc bead. Press the side petals more firmly against the disc with your fingers. If needed, you can squeeze them down more snugly with nylon jaw pliers. |
 |
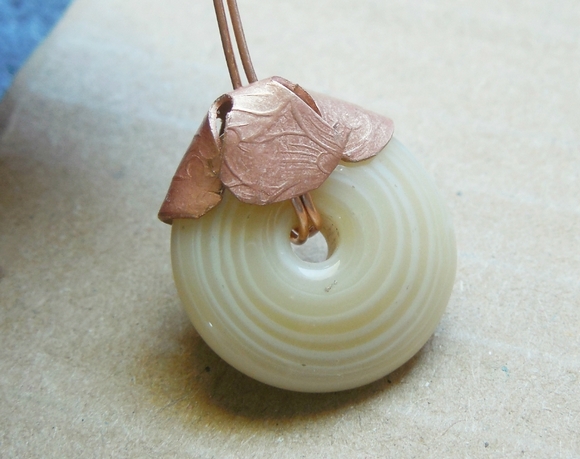
| 13. When the side petals are firmly cupping the disc, with your fingers, push down the front and back petals until they are snugly in place. If you end up fiddling with it too much and it gets too stiff to work with, you can re-anneal. |
 |
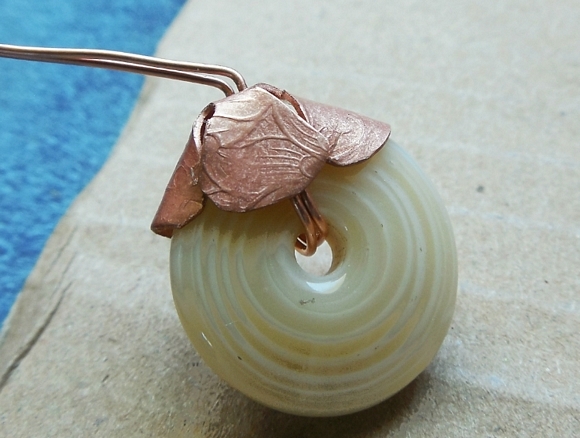
| 14. To create a hanging loop for your earwire, turn your disc to the side and grasp the two wire tails near the tip of your round nose pliers as shown (you can mark your pliers to help you make your earrings even), and bend the wire to about a 90° angle. |
 |
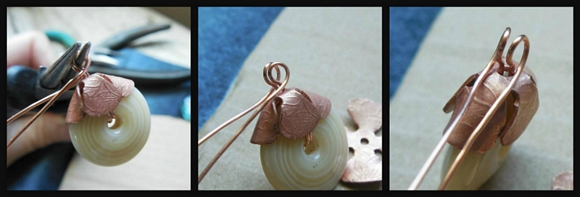
| 15. Then, about mid-way up the plier jaw (you can use step jaw pliers for greater uniformity), grasp the wire just above the bend you just created, and fold the tails back up over the plier jaws to create your loop, keeping the tails on opposite sides of the wire neck as pictured. |
 |
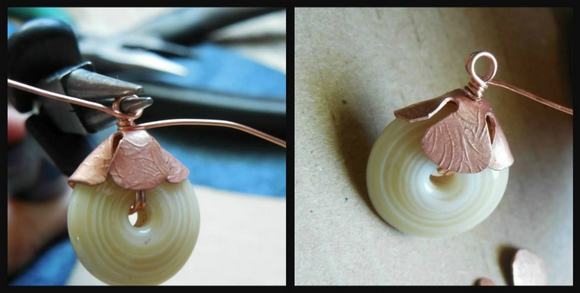
| 16. Keeping your round nose pliers inserted in the loop you just created, wrap one of the tails down around the wire neck until it’s wrapped tight against the cap (pay attention to which one you wrap first, because you are going to wrap the opposite one first on the other earring). Wrap it as many times as it will go, creating a snug fit against the cap, tightening the last wrap with your bent nose pliers. Trim and squeeze the end in with your bent nose pliers. |
 |
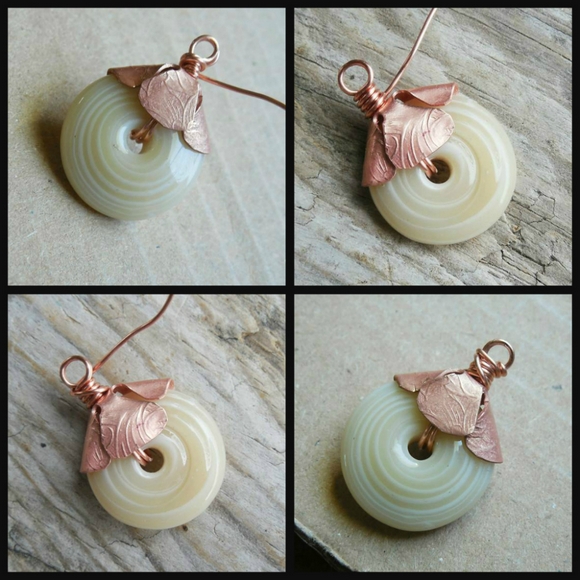
| 17. Then grasp the loop with your bent nose pliers, grasp the remaining tail with your chain nose pliers, and wrap down over your first wrap until it is flush with the cap, and then bring the wire back up diagonally over your wrap and around the loop once, trimming it so that you can tuck the end of the wire inside the loop. |
 |
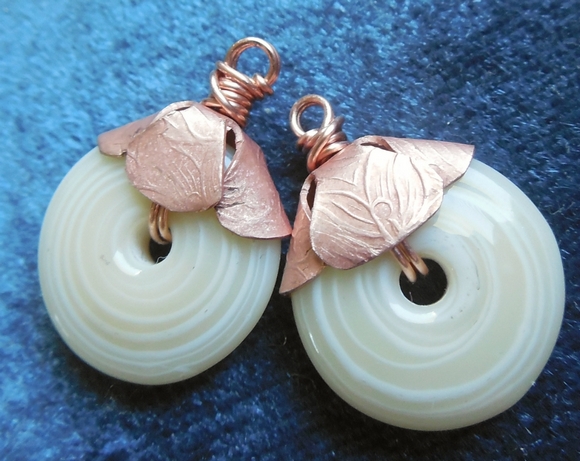
| 18. Repeat this process with the second disc and cap, but wrapping the other tail first, so that your wraps end up as mirror images of one another. |
 |
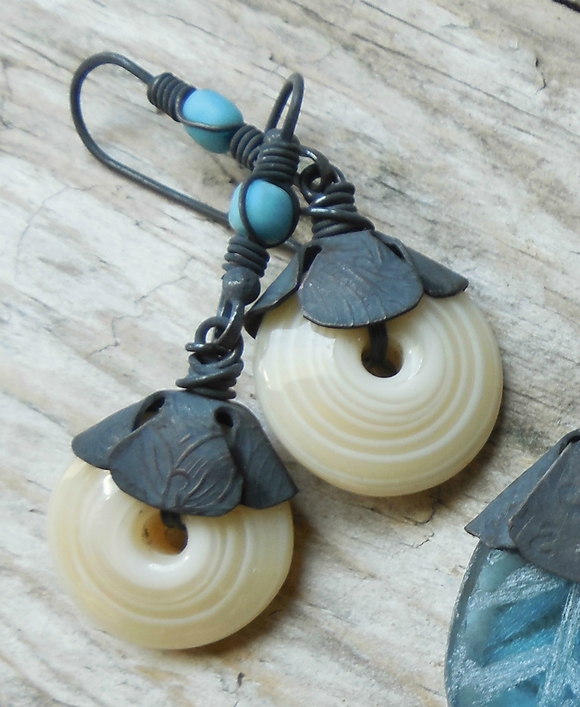
| 19. Add your earwires (this tutorial does not include instructions for making bead-wrapped earwires), and antique the whole assemblage together if you wish. I blackened mind in liver of sulfur, and then added color highlights on the caps with gilder’s paste. |
 |
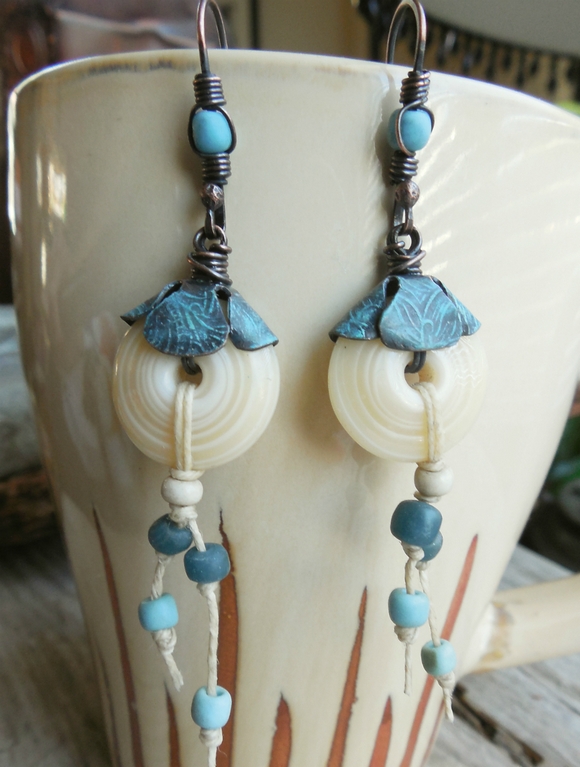
| 20. You can hang more elements below the disc, or leave it plain! It looks great either way! Here I used waxed Irish linen cording with basic lark’s head and overhand knots and Indonesian glass beads from Happy Mango Beads. |
 |
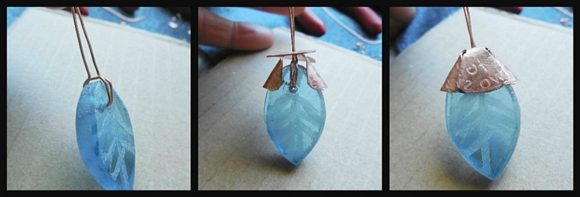
| You can use this same technique with any size disc bead (just cut a larger metal disc to make your poppy). You can also use this technique with a front drilled, top drilled, or center drilled pendant or bead of virtually any shape: |
 |
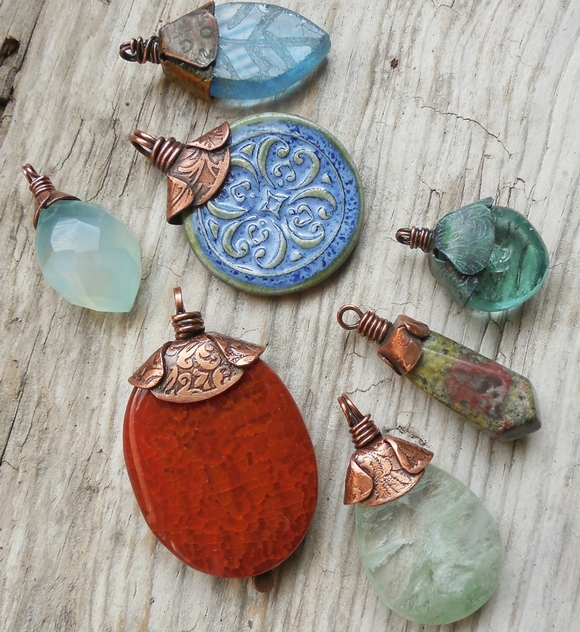 |
| You can also simply dome the cap and use it on a top drilled spear or tube shape, or a round bead: |
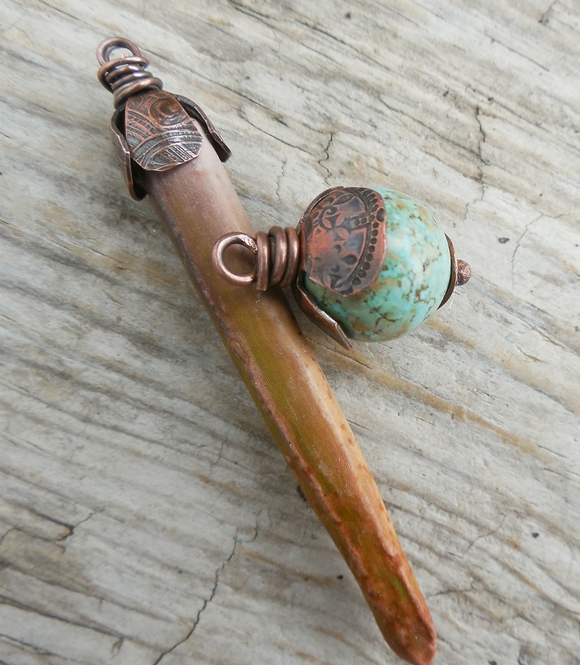 |
| You can also create other shapes with your metal cap, such as a square or an oval (works great with a donut!), or rotate your poppy for a different look: |
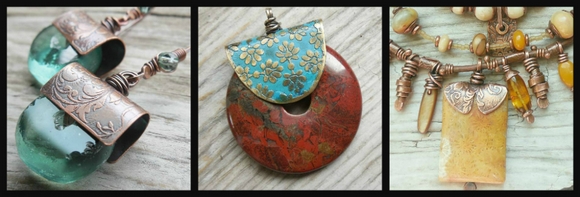 |
| You can make it as ornate as you want! Let your imagination run wild! Here are some other Happy Mango Beads products that work great with this technique: Fossil Coral Agate Beads Turquoise Howlite Peace Sign Pendant Recycled Glass Pendants Sea Urchin Spines Pink Glass Disc Beads Picture Jasper Round Beads Moukaite Oval Tabular Beads Brass Triangular Beads |
 Loading... Please wait...