Categories
Company Info
Inspiration & More
Agea - Ancient Roman Glass Necklace Tutorial
Tutorial by Keirsten Giles
Visit Keirsten's Etsy shop: LuneDesigns and follow her blog: The Cerebral Dilettante
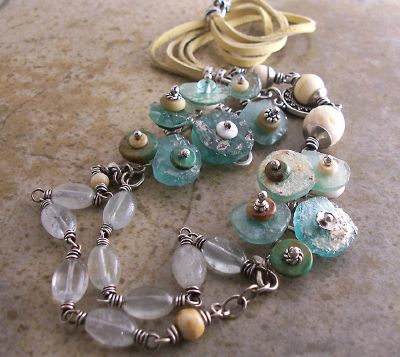
| I thought these ancient Roman glass discs from Happy Mango would make a fabulous necklace. Not only would it be visually stunning, but it would be like wearing history around your neck! According to Happy Mango, these beads are about 900-1200 years old, and were found in Afghanistan. I loved the translucency, the varying shades of blue-green and the whitish accretions on them, they reminded me of whitewashed Grecian villas and the Aegean Sea. |
 |
Skills required:
Tools:
|
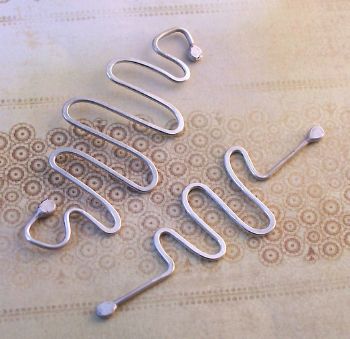 |
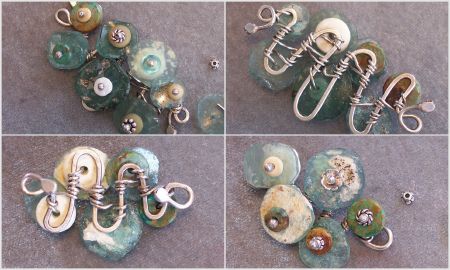
| You could certainly use any metal you wish for the base pieces, but be aware that because of the translucency and thinness of many of these Roman discs, the color of whatever you use for the base is going to show through and affect how the beads appear. For that reason I chose sterling silver; its light hue and neutral color caused the least distortion to the color of the beads, and I really wanted that translucent pale blue-green to show. (If you can't afford sterling, you may want to try stainless steel; it's much harder to work with and you wouldn't be able to ball the ends, but a snake shape should be doable and the color of the metal won't affect the appearance of the glass discs.) I just "eyeballed" the dimensions of my base pieces here (I hate measuring things!), but if you wish, you could certainly be more exact about that. You could cut out cardboard pieces in the general dimension of the discs, and experiment with craft wire or pipe cleaners or something like that until you got the size and shape you wanted, and transfer those dimensions to your metal of choice. I would highly recommend trying out this technique first with base metal and inexpensive disc beads to get a feel for it. I think I ended up using about 18" of 16 gauge dead soft sterling silver wire total for the two base pieces. You'll want to use the dead soft version of whatever you're using. I left the longer pieces on either end of my bases pieces open; these would later be closed into loops for fastening to the rest of the necklace to keep them out of the way of the beads. (see picture above) Once all the beads are on, you can complete your loops underneath the piece. I made my own ball headpins with a torch. I wanted the ball of the pin to be part of the design. I made each headpin about 4" long, just to be sure I had enough length for wrapping (you have to get your MacGyver on a little to get the discs to lie flat). |
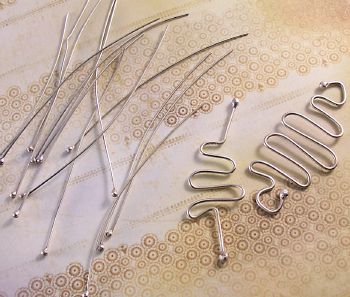 |
| I probably could have gotten by with headpins with a finished length of 3", but there's nothing worse than getting to the end of your wrap job and realizing your pin is too short! I used 20 gauge (dead soft) headpins for this (20 gauge just barely fit through the holes), which ultimately proved a little difficult to work with, although I like the way it looks; 22 gauge would have probably been a little easier to work with, and the ball still large enough to contribute visually to the design. I would not recommend tumbling your headpins prior to use, they'd be far too stiff to work with easily. Ball headpins aren't strictly necessary, you could use regular headpins with a tiny bead at the end. However, commercial headpins are going to be hard to find in a 4" length. You might have to get them custom made. Once my base pieces and headpins were ready, I pulled out the beads and experimented with them in different positions on my base pieces. |
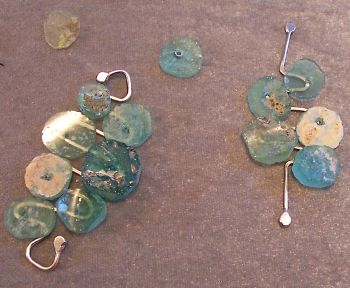 |
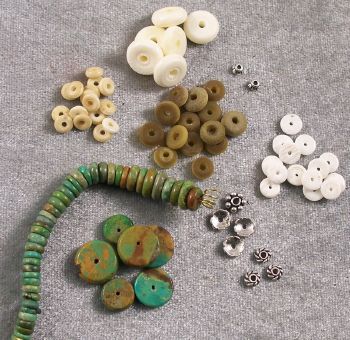
| I chose which beads I thought I would use and in which order (this eventually changed!!). My accent beads for this piece included natural bone spacers, beige glass discs, turquoise discs, puka shells, silver and pewter spacer beads, and even an upside-down silver bead-cap. I also used buffalo bone spacers underneath a couple of the discs. |
 |
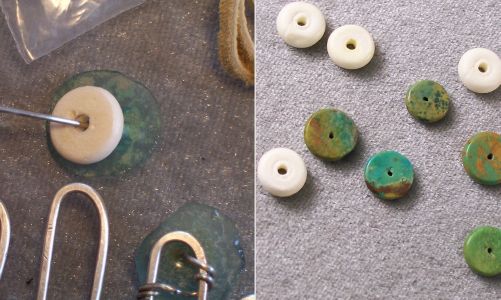
| I also wanted to reinforce the hole area on the discs, because they are fragile. I didn't want to be tugging directly against the glass with my headpins as I was trying to get them tight. For some of the thinner discs, I also put another bead underneath them to keep them from breaking as they were pulled tight against the base. To keep from distorting the color, I used only white or turquoise color discs depending on how I wanted the design to appear. (I would highly recommend that you use reinforcing discs with these beads if you're going to use this technique with them.) |
 |
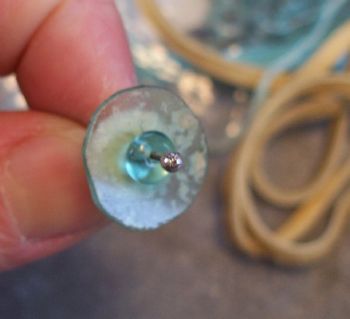
| I just picked a spot to begin and started fastening discs to my base piece. First, stack your discs how you want them, and position them where you want them on your base piece. |
 |
| Flip your piece over to begin wrapping. Start wrapping on one "leg" of your snake shape. |
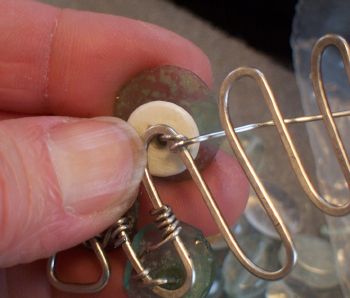 |
| I went around a couple times. It will be important to get these wraps nice and tight, so the disc isn't loose. Make sure the ball of your headpin is pulled tight and flush against the accent disc. Then cross over to the other leg. I tried to go over and under to keep from having so much wire underneath the disc. Again, make sure your wrap is nice and tight. |
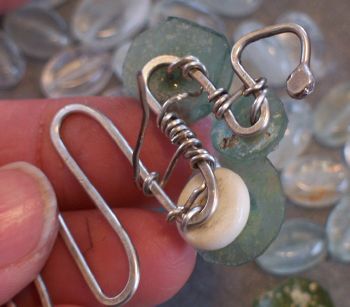 |
| Wrap that second leg two or three times. Make sure the disc feels secure on there and is lying flat. Be careful not to press down on the edges of the discs as you're wrapping, as they may break, and watch where your pliers are for the same reason. |
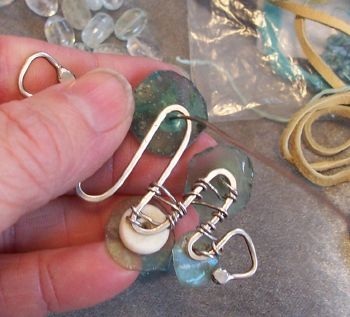 |
| The series of images above is actually from the third disc I attached. You can start anywhere you like. I started at the top of my first piece, but that isn't necessary. Keep fastening discs in this manner to your base as pictured. I eventually decided to use a couple turquoise discs too, as there weren't Roman discs small enough to fit at the end of my design. |
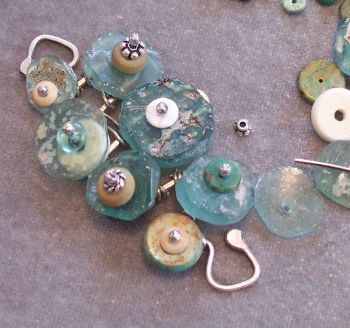 |
| It doesn't matter what the backside looks like-as long as your discs are secure and flat, and there are no ends poking out to scratch the wearer, you're good! Just think of it as a piece of abstract art. I was seriously making this up as I went along. |
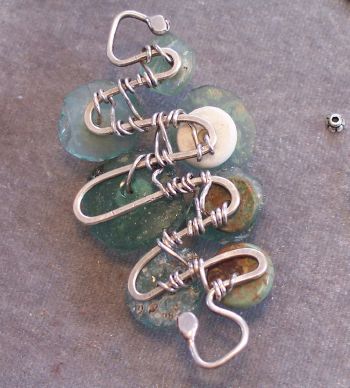 |
| Once you've completed attaching your discs, you can create your loops from the free ends. Use your round nose pliers to bend them into a loop under the base. If you want them to show more, you can make them longer to start with. Mine ended up kind of partially hidden underneath the base. I didn't think I could bend them on top of the piece without damaging the discs so I did it underneath. |
 |
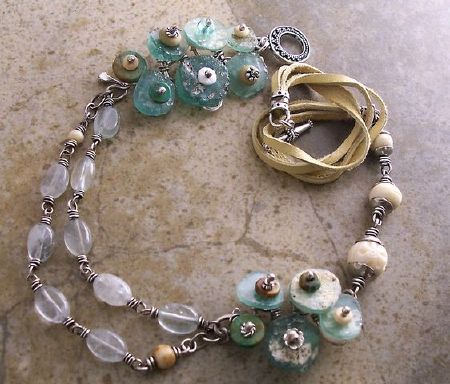
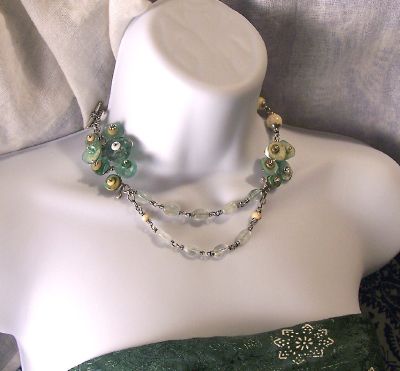
| Once you've completed your loops, you can construct the rest of your necklace however you wish. (Actually, the smaller focal I made would make a great pendant too. That would certainly be an option.) I wanted to incorporate beads and some kind of fiber. I had some palomino‑colored deerskin lacing that I thought would work nicely with the discs, some pale aquamarine ovals that I thought were a nice compliment to the glass, and then bone beads that echoed the buttery color of the leather and the accretions on the discs beads. A silver plated pewter toggle clasp finishes it off. |
 |
 |
 Loading... Please wait...