Categories
Company Info
Inspiration & More
Heishi Bead & Brass Bracelet Tutorial
Tutorial by Adrianne Surian
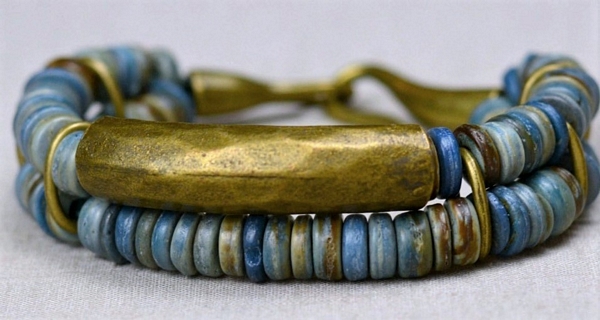
| This tutorial combines dyed coconut wood heishi/disc beads with brass accents for an earthy, organic-looking DIY bracelet. It only takes a few simple supplies, and the design is so versatile that you could make it in either a single-strand or double-strand style. Choose from a wide variety of colors to make this bracelet your own! |
|
|
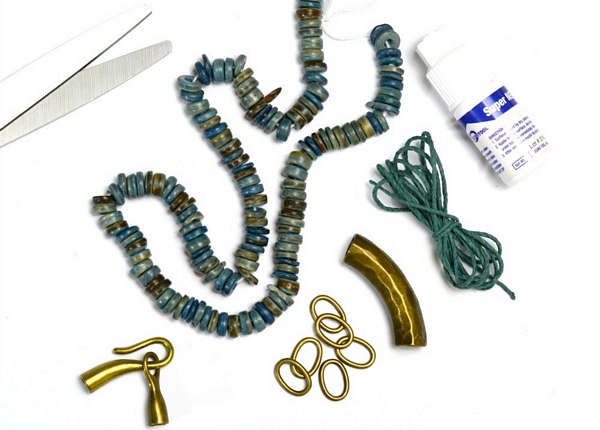
Suggested Tools & Materials:
|
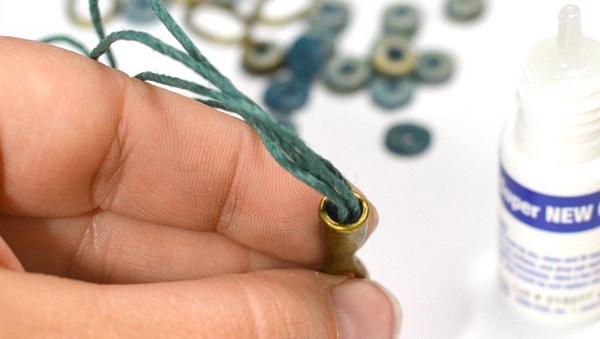 |
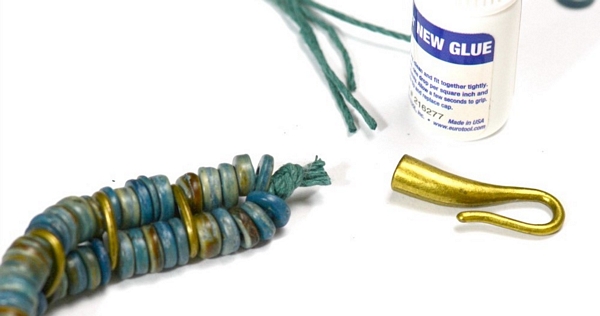
| First, cut 36" of hemp cord into 4 equal length (9" each) strands. Tie them in an overhand knot if they fit too loosely in your cap. This step may or may not be necessary depending on the style of clasp and the weight of the hemp you are using. If you are using glue-on hook and eye clasps, glue the ends of your hemp into one cap with e few drops of jewelry glue. For a more traditional toggle-style, you can simply tie a 18-inch length of hemp through the loop. |
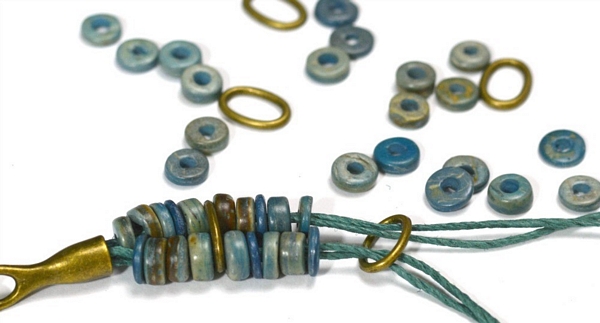 |
| The advantage to using a double-strand of hemp in this project is to fill the glue-on end caps. You may choose to use a single strand instead. But if you're doubling them, separate them into two groups of two, and string on your beads. Add approximately 1/2-3/4" of coconut wood beads onto each strand, then string a oval ring bead over both strands. Then continue this pattern. |
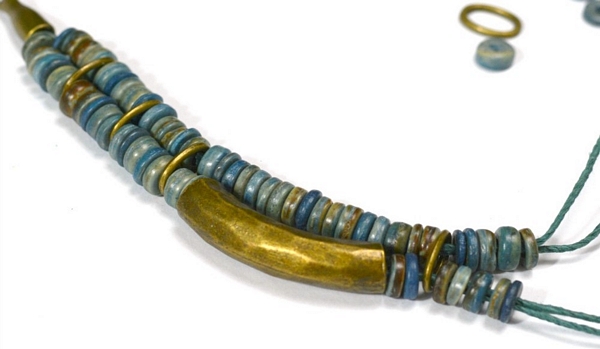 |
| When you reach a length of 3" of beads, it's time to add the tube bead to one strand of hemp. Continue with the coconut wood beads on the other strand. When they reach an equal length, continue repeating the pattern you began with, 1/2-3/4" of coconut wood beads, offset with a oval ring bead. |
 |
| When you reach the end of the bracelet, tie another knot and glue the opposite end cap into place. If you're using a toggle clasp instead, tie the toggle into the knot to secure it. Jewelry glue dries quickly, so your bracelet should be ready to wear within 10-15 minutes! |
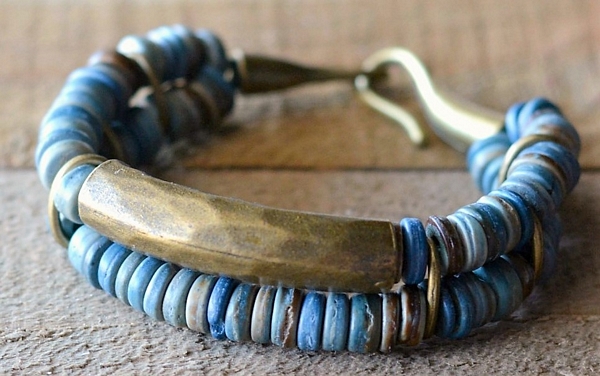 |
| The end result is a bracelet that makes up quickly, with lots of room to modify the length and details! Try adding a brass tube bead to both strands, or add a dangling charm. The possibilities are endless and all up to your personal creative flair. The finished length can easily be adjusted if you string your beads first, and check your length before adding the final end clasp. |
 Loading... Please wait...
